Trekking Photography : Tips to click better pictures on a trek
Hello friends,
Hope you all are doing good and utilizing the quarantine time at home by learning some new skills. I often get messages from people on Instagram regarding trekking photography tips and suggestion. In this blog, I have tried to cover some of the most commonly asked questions and have shared some tips which will help you to capture amazing pictures on your next trek.
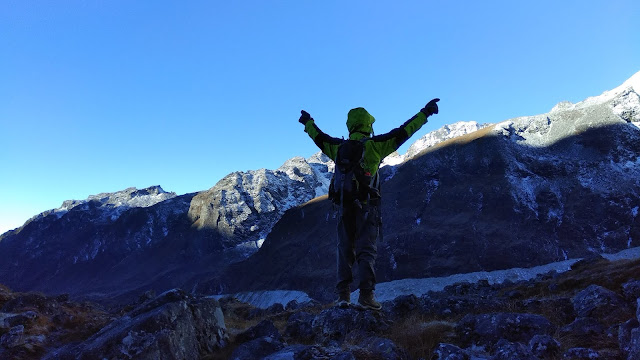
I started my photography journey back in 2015 when I got my first DSLR camera. I still consider myself a beginner as I believe photography is a continuous learning process. I started with street photography and documenting my travels to different places. Nowadays, I am more focused in Landscape and Travel photography. I am an avid trekker and love to spend time with nature. My trekking trips in the mountains allowed me to explore the landscape photography. Landscape photography may seem simple as you are surrounded by beautiful landscapes, mountains, rivers, lakes and waterfalls. But to make a great photo there is so much effort behind a picture other than just pulling out your camera and clicking the shutter button. Trekking presents both, a fantastic opportunity and a great challenge.

In this blog I am sharing some important tips that will definitely help you to understand some basic concepts of photography. This will help to use your camera more effectively in order to capture amazing photographs on your next trekking trips.
1. Understand your camera
This is the most important part for starting with any kind of photography. There are different kind of camera available which ranges from entry level to full frame camera. DSLR cameras are most widely used however, one of the main disadvantages of DSLR camera is its size and weight. It becomes very difficult to carry them on a trek. A good alternative to DSLR is point and shoot camera which are relatively compact in size and not very large in size. Nowadays phone camera comes with advance technology and features that are as good as a DSLR or point and shoot camera. So, if you are a beginner and want to capture pictures for sharing it with your friends and on social media only then phone camera or point and shoot camera will be the perfect option. If you want to consider photography as a career want to click pictures for your portfolio and with a plan to print them then a good DSLR camera is must. I personally use my phone camera and GoPro camera on all my trips in the mountains for the simple reason that both are easy to carry and serves my purpose.

Whatever is your preferred camera, make sure that you learn how to operate them before taking them on any trip. You can take help from your photographer friends or various tutorial videos and blogs available on internet. Study the manual and try using all the function given in your camera to understand them better. The more you will use them and click pictures using it, it will become easier for you to get understanding of different settings.
2. Framing and Composition
Composition and framing are the most integral part of the process of photography. A well framed picture has a perfect arrangement of the different elements such as clouds, mountains, rivers, trees, human subject etc which creates a visually appealing picture that can tell a story and also evoke certain emotions to a viewer. To create a picture with perfect frame and composition, follow three simple techniques:
(i) Use of ‘Rule of third’
This is the most common technique to create a balanced and visually appealing frames. To apply the rule of third you simply need to divide your image into thirds using vertical and horizontal imaginary gridlines. You can position the objects to any of the intersection of two lines or alongside the gridlines. Most of the devices have in-built function of using a grid on the screen to help you compose images using the rule of third.


Some more examples:
(ii) Use of ‘Leading Lines’
Leading lines in photography means any kind of objects that can draw view’s attention to any particular object in the frame. It is an effective way to make the picture look impressive and highlight the key objects in the frame. This is very helpful in landscape photography where one can use objects like river, streams, trail, clouds etc to guide the viewer’s eyes through the picture and focus on the main objects.

Some more examples:
(iii) Change your ‘Point of view’
This really helps to make your photographs unique from others. Try and experiment with your position while clicking a picture. Take shots of the same place from different angles. Shoot from eye level, up high, down low, waist level, ground level to get more interesting angles and frames for your pictures.

Some more examples:
3. Choose a lowest possible ISO
A low ISO will ensure that the picture quality is highest and there are very less grains. ISO can be set using the manual mode on your camera and phone. Try to keep the ISO between 100-400 as far as possible to prevent grains in the picture. Those who have been using a camera for a long time and know the technical part of it can always experiment different ISO settings that can also allow you to use different shutter speed and aperture. Those who are beginner can use the auto scene mode on the camera and phone. This will automatically adjust the camera settings depending upon the available light and the surroundings. For landscapes one can also try using the HDR mode which will give more vibrant colors.

4. Use a tripod if required:
Using a tripod really helps as it reduces the shake while clicking the pictures. Most of the time we end up clicking blurry pictures because it is difficult to keep the hands firm and steady. Tripod helps to prevent the shake if you clicking any pictures using a low shutter speed. In the mountains you will get so many opportunities to click the milky way or night sky, for which a tripod is must. Rather than carrying a heavy tripod, I would recommend Gorilla pod which are compact in size, versatile and easily available online/camera store.

5. Use of Golden Hours
The time after sunrise and before sunset is referred as the ‘Golden Hour’. This period is considered the best time to shoot as the light is soft around this time and it gives a nice warm glow to the objects, particularly the landscapes. I never miss an opportunity to witness a sunrise / sunset in the mountains as it gives ample opportunities to capture the beauty of the place. You get to witness nature showing all its colors during sunrise and sunset.

This doesn’t mean you can not click during any other times of the day. However, if the sun is too strong then the extra lights will make the picture look over exposed. Another good time to click pictures in the mountains is during midnight as the sky is usually very clear during that time and starts are clearly visible.
6. Research about the trek
If you are visiting a new place, make sure you do enough research about it before you leave your home. You can read about the weather, terrain etc through some blogs and can also checkout the pictures. This will help you prepare well for the trek and you can plan and pack your camera gears accordingly. You can take inspiration from pictures clicked by others.
7. Explore around to scout your location
Once you start your trek always make an effort to explore the campsite or the places that you are visiting during the trek. If you have sufficient time, take a walk around your campsite and try to find good spots to click the pictures. You can visit the same spots at different times to click the pictures in different lights. Scouting a location or planning a picture isn’t necessary always but this surely will help you to get better pictures and find something unique. This simply means to find a ridge or a small his to get the panoramic view of the surrounding area, or reaching near the lake or any water-body just before the sunrise or sunset to click some reflection shots.
Some quick tips:
Camera body:
Unless you’re a working professional, carry one camera with you. This will allow you to enjoy the trek more without any worry about saving your camera from any kind of damage. These days phone camera have decent camera and can be a great alternative of heavy DSLRs.
Lens:
During the trek you are most likely to click lots of landscape pictures. Avoid carrying multiple lenses and try to stick with wide-angle lenses (16-35 mm lens for example).
Extra batteries:
This is very necessary as you will not find electricity on the trek in the remote areas. Always carry some extra batteries and keep them wrapped in a cloth so that it doesn’t get drained fast due to the cold temperatures. I always carry a solar charger and a power bank to charge my pone and GoPro.
Memory cards:
Always carry a backup memory card if you’re doing a multiple-day trek.
Tripod:
Tripods are usually heavy and big in size. If you are confident of managing the shake while clicking, avoid taking a tripod as it will be difficult to manage it during long walks. You can always use some stone or your rucksack to get the elevation and place camera to click sharp pictures without a tripod.
Avoid dust:
The trails are usually dusty in few places. Make sure you cover your camera while walking on a dusty trail. Use the lens hood to protect your camera.
Waterproof your gear:
The weather in the mountains is unpredictable. Make sure to carry a waterproof camera bag or some plastic bags to keep your camera safe from rain.
I am sure these tips will be helpful to you on your next trekking trip. If you find this blog helpful, let me know in the comments. If you have any question, feel free to reach out to me on my Instagram Page: www.instagram.com/umangdavevisual
This post was originally shared on: Adventure Pulse Blog


Comments
Post a Comment